Docker basics - finding an image and running a container
Introduction
You might’ve heard about this Docker thing. I won’t go into details on what it is and how it works - if you’ve never heard about it, you might first want to get familiar with this short presentation page. Once you’ve read that (or already know what it is), let’s focus on some basic capabilities - starting with images and containers and how to use them to solve a real-case problem - exploring one of those fancy languages you always wanted to try out but didn’t want to bother with installation, environment setup and clean up once you’re finished.
Before we continue, though, three important points:
- This series will be about basic usage, it’s meant to introduce you to the topic and pave the way for further research.
- I’m in no way an expert on this topic, I’m not even advanced - I’m actually a beginner and haven’t used Docker in any serious project yet. Especially that last part might bother people (which is understandable) - if you’re one of them, you might want to stop here :)
- I’m using Windows and I’ll cover Windows - which doesn’t mean you can’t follow with a Mac or Linux - you probably just need to do the installation part on your own and the rest should be the same
Installation
Simply follow the official installation guide. In case of Windows, there are two options: Docker or Docker Toolbox. The difference is that new Docker requires a 64-bit Windows 10 Pro with Microsoft Hyper-V. If you have an older version of Windows, use Docker Toolbox, which works on top of Oracle Virtual Box.
When using new Docker, you’ll get this:
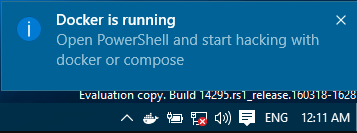 That will probably be the cutest tray icon on your machine.
If you use Docker Toolbox, you’ll get several tools, one of them being a Docker Quickstart Terminal.
In case of native Docker - you can simply run commands from your favourite terminal (have you seen Babun?). In case of Docker Toolbox - launch the Docker Quickstart Terminal and type your commands in there.
One more thing - with native Docker, you’ll probably simply use localhost to access your webapps inside the containers, but with Docker Toolbox you might want to pay attention to information displayed as you launch the terminal - it’ll give you the IP address you need to use to access your containers. In my case it’s 192.168.99.100.
A quick summary - on Windows, you have two options:
- Native Docker if you’re using a 64-bit Windows 10 Pro with Microsoft Hyper-V - you get a tray icon and can use Docker commands from any terminal.
- Docker Toolbox if you don’t have the Windows version required for native - uses Oracle Virtual Box and you need to launch the Docker Quickstart Terminal to use the commands.
Usage
Let’s consider a simple and quite realistic example - so you’ve heard about this cool new JVM language called Scala (if you hate Scala, bear with me - it’s just an example :)). Being the professional developer that you are, you always seek to learn new things, so you’ve decided to follow some basic guides on the topic and you’d like to have a REPL to follow along - but you not necessarily want to download and install Scala on your machine. Your working machine is already quite cluttered with different tools and toys, there’s probably some installation overhead you need to take care of, like setting environment variables or whatnot and meh, you just can’t be bothered with it! Not to mention cleaning up after you’re done.
So how can you use Docker to solve that issue? Very simple - you can run a container that contains Scala and any dependencies it might require and exposes a REPL for you to use.
In order to do that, we need to launch a container with a specific image.
If you’re a programmer, then understanding what container and image are is simple: container to image is like an object to a class.
Image is an immutable file that you download from the internet. It describes how to build a particular container. They can be quite large, so they are built in a modular fashion, to minimize the amount of data that needs to be transferred over the network.
Container is an instance of an image - Docker takes the instructions contained in an image and by following them it creats a container - a lightweight, portable encapsulation of an environment that runs a specific set of applications.
In our example case, we want to find a Scala image and launch a container from that image.
How to find an image?
Two options - either a traditional google Scala docker image or run the docker search scala command. What I personally prefer is to use docker search and then google a bit about the more popular images to see if they’re what I want.
 Does that single out-of-place ‘6’ bother you, too? Probably didn’t, until I mentioned it. You’re welcome.
As you can see, there’s quite some choice of Scala Docker images. Let’s look at the first one, since it has the most stars.
To read some details about it, go to https://hub.docker.com/r/IMAGE-NAME which in our case resolves to https://hub.docker.com/r/hseeberger/scala-sbt/. There we can find some information about installation, usage, license, etc. Luckily, this image doesn’t require any special treatment so we can try to use it.
How to launch a container?
Once we’ve found an image we want to use, it’s time to launch a container from it. The command for that is as follows:
docker run -it hseeberger/scala-sbt
If you want to know what the particular flags mean, there’s of course a docker run --help available. The parameters we use do the following:
-istands for interactive - the STDIN will be open even if we are not attached-tstands for tty - we’ll get a pseudo-tty to interact with the container
Those flags are often used together, so you’ll probably want to remember simply that -it will spin up a container you can interact with :)
Once you run the docker run -it hseeberger/scala-sbt command, you’ll see Docker downloading some stuff. Those are the images required to build your container (remember that images are modular?). You don’t need to know where they’re stored, remember where the image files are or anything - it’s all managed from one place with docker image commands (more on that in the last section).
What you’ll see after the run command finishes is probably something like this:
root@3d5b83c7ea03:~#
All of that trouble just to get a different command prompt? :) Obviously not, what you have here is a shell of your fresh container, ready to accept commands. If you execute an ls, you’ll see we have a scala-2.12.2 directory available. Let’s cd scala-2.12.2/bin and then execute scala.
And there you have it. A Scala REPL. You can now see how Scala works in practice, without cluttering your computer with either Scala nor any of it’s dependencies. Once you’re done, simply Ctrl+C to exit the REPL and then execute exit to quit the container.
But wait, we can do better!
Let’s recap what you need to do at this point to launch a Scala REPL (considering that Docker installation is a one-time step you’ve already done):
docker run -it hseeberger/scala-sbtcd scala-2.12.2/binscala
That’s three commands. Can we do it better? Yes we can! But we’ll need a different image. The one we used is basic scala and sbt. Let’s check the page for the second most used Scala image. Reading that page, we can see that we can run the scala REPL with a single command.
Let’s run it then: docker run -it williamyeh/scala (let’s ignore the --rm flag for now).
And there we have it, this time our container directed us to the REPL directly, so we can now run a Scala REPL with a single command and still keep our computer clean!
You don’t need to bother with installing Scala or any of it’s dependencies, you don’t even need to know what those dependencies are. There’s also no clean up involved - if Scala’s not your thing and you just want to get rid of it from your machine, stop the container and remove the image and there’s no trace left.
Another benefit is that your environment is clean. It contains only the basic OS and what’s needed by the specific tool you need. Remember all those times some tool did not work because your computer had an incompatible version of something that the tool required or behaved in a weird way because it was influenced by some unknown force? That won’t happen in case of containers.
Why did the other image behave differently, though? That’s something I intend to discuss in another post, where we’ll talk about how to create images. Let’s just treat it as magic for now :)
Traditionally, a quick summary: to run a container (assuming you’ve installed Docker and know the image you want to use), you need to simply docker run -it your/image. That’s all there is to it to get a container running :) What the container will do depends on the image of your choice.
There are many use cases for Docker, what I’ve shown here is one of them - when you want to explore some tool but not necessarily install it on your machine directly. Some others include a common environment for a development team or testing a tool/framework that cannot work under your host OS.
That’s all for this blog post - you can read further for a few additional commands you might want to know at this point.
Useful commands
You now know how to:
- install Docker
- find an image you need
- download the image
- run a container
There are some other basic commands you might want to know. I won’t go into details, but it’s worth mentioning them.
docker ps will list all your currently running containers (because not all of them are destroyed immediately when you exit, like in our simple example). If you add the -a flag, it’ll list all containers and their current state.
docker image ls will list all your images. You might want to remove old images to free up some space. Don’t know how to do that? Use docker image --help and find out :)
docker stop <name> and docker rm <name> (often used together, docker stop <name> && docker rm <name>) will stop/remove a container. A container can also be automatically removed upon stopping by adding a --rm flag when launching it via docker run.
If you don’t specify a name, a container gets a random one which may be cumbersome sometimes. To give a name to your container, simply add a --name something flag to docker run.